

Christopher Schultz
24 de abril de 2025
Solid tool that will last, very minor complaints
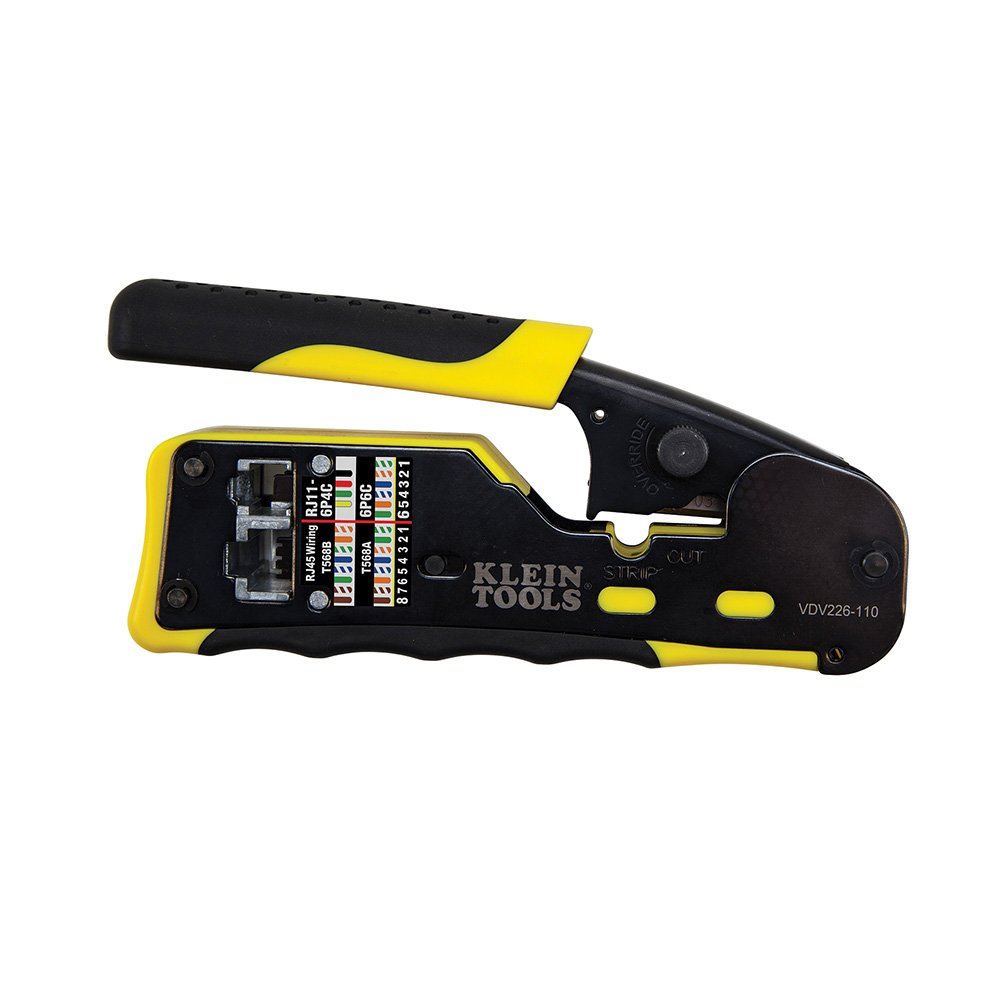
Worked flawlessly on the first try. I made two cat6 cables quickly without any mistakes.This review is 4.5 stars (or maybe between 4.5 and 5) but Amazon only allows whole-stars. I decided on 5 because 4 is too low.The tool feels sturdy and the mechanism is firm but not tight (perfect). This is the first time I've used a ratcheting crimper, and I'm a fan over non-ratcheting crimpers (though it's been decades since I last crimped any RJ45 connectors). The sheath-cutter works surprisingly well, though you should always inspect the individual wires to see if you have cut their sheaths as well.If you have large hands, this tool will feel small, but there is no issue using it. This tool seems like it would be equally easy to use for right-handers and left-handers, though each would likely choose a different grip (thumb near the fulcrum for left-handers, thumb near the end of the handle for right-handers).This tool really is great, I only have a few small issues.My only real complaint about this tool is that it can't be closed for storage. It's got a ratcheting handle so you can clamp-down on the connector during crimping, but then it always springs back to its fully-open position. Imagine having to store all your scissors in the "X position" (open) rather than the "Y position" (closed). I guess I'll just get some twine to hold it closed when it's in the drawer.There is a "safety override" knob on the handle. It's labelled "override" on the tool and the instruction card helpfully clarifies that as a "safety override", and it's used to allow you to release the ratchet before it's reached it's final position. I kinda feel like the solution to the "won't stay closed" problem could have been solved using this same knob, but rotated in the other direction, perhaps.When inserting the RJ46 connector into the tool for crimping, the connector does not lock like it would, say, in an actual Ethernet connection. This means that you have to ensure that you really, REALLY made sure to push the connector all the way in, and that it doesn't move at all as you perform the crimp. The crimping operation does not push the connector either way, so you SHOULD be okay, but you are on your own to ensure proper alignment. The "crimp nest" appears to be a separate die-cast component and could easily have been designed to have a clip to ensure proper and steady positioning.This crimper unfortunately comes with no connectors, and the bundle with connectors is an extra $15 for 50 connectors. I decided to buy much cheaper connectors and they worked perfectly fine. I kinds thing think this too should come with some really small number of connectors, like maybe 4. Otherwise you have to buy a lot of them if you only need a few. I suppose if you are buying a crimping tool, you are not interested in making just one or two cables, but at least it would let you get a sense of what quality connectors you would need to buy, or to compare to others you might find.The wiring diagrams directly on the tool are great, but they are stickers. I suspect they will wear-off over time. Anything that won't last the life of the tool isn't really worth much. Sure, you can find the wiring pattern on the internet, but having it on the tool is SUPER nice.The instructions tell you to strip between 1.5" - 2" of the sheathing which I found to be way more than necessary, but it depends upon the type of connector and a few other factors. In my case, I decided to start conservatively and cut a full 2" off the end, and ended up with 3/4" or more of discard wire pieces being sheared-off during the crimp (which is the point of the "pass-thru" design). That seemed to me like a lot of waste. In one instance, the outer wires weren't completely cut during the crimp/shear operation, but I could just twist them off the end of the connector after I removed it from the tool. I think the blade could afford to be 1/16" wider or so.The instructions don't make this suggestion, but after you have straightened each of the individual wires for insertion into the connector, I would recommend trimming them all flush to make the placement easier. The cutter doesn't look like it would work well for this, but it does: just put the wires across the oddly-angled center of the tool and close the jaws.It looks like there is plenty of space to lose stray cut-ends of wire into this tool. I've only had it for 24 hours so I haven't had much opportunity to fill it up with junk and have to clean it. There are 3 pins holding the two faces of the tool together, and each of the 3 has a retaining ring on it, so I'm optimistic about the serviceability of this tool. Had them been rivets or some other permanent fastener, I'd be less optimistic.Ver másVer menos
19 personas la encontraron útil